Tuesday 12 January 2021

And now for something completely different...

 I spend a lot of time in computer games taking screenshots and "photos" and decided to share some of my favourites over the last few months...

Ghost of Tsushima


Assassins Creed Valhalla


Thursday 10 September 2020

Building Hobbiton

 This is a little project I have been working on to build a hobbit hole!


Monday 20 April 2020

Mansions of Madness - Temple Guardian Painting Tutorial


I have posted a new video to my Youtube Channel today, showing you a beginners guide to a quick paint job for the Temple Guardian from the Mansions of Madness expansion "Path of the Serpent".


You can view the game on the FFG website here:


Saturday 9 February 2019

Fantastic Beasts and the Deathly Hallows

Whilst browsing some Fantastic Beasts posters today (as you do), I spotted the Deathly Hallows symbol in the background.


Then I noticed it in another poster.


And another.


And then I started to see it in promo images, "first look" images, and the Bluray covers.


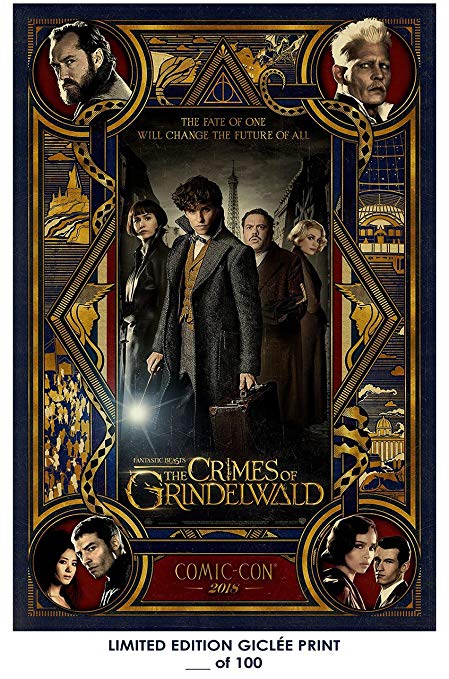
This one is more subtle - note the circle behind them, the triangle formed from the lines hanging down, and the middle wand formed by Newt


This one it is formed by the umbrella making the circle, the tower giving out the light as the triangle, and the Eiffel Tower forming the wand line


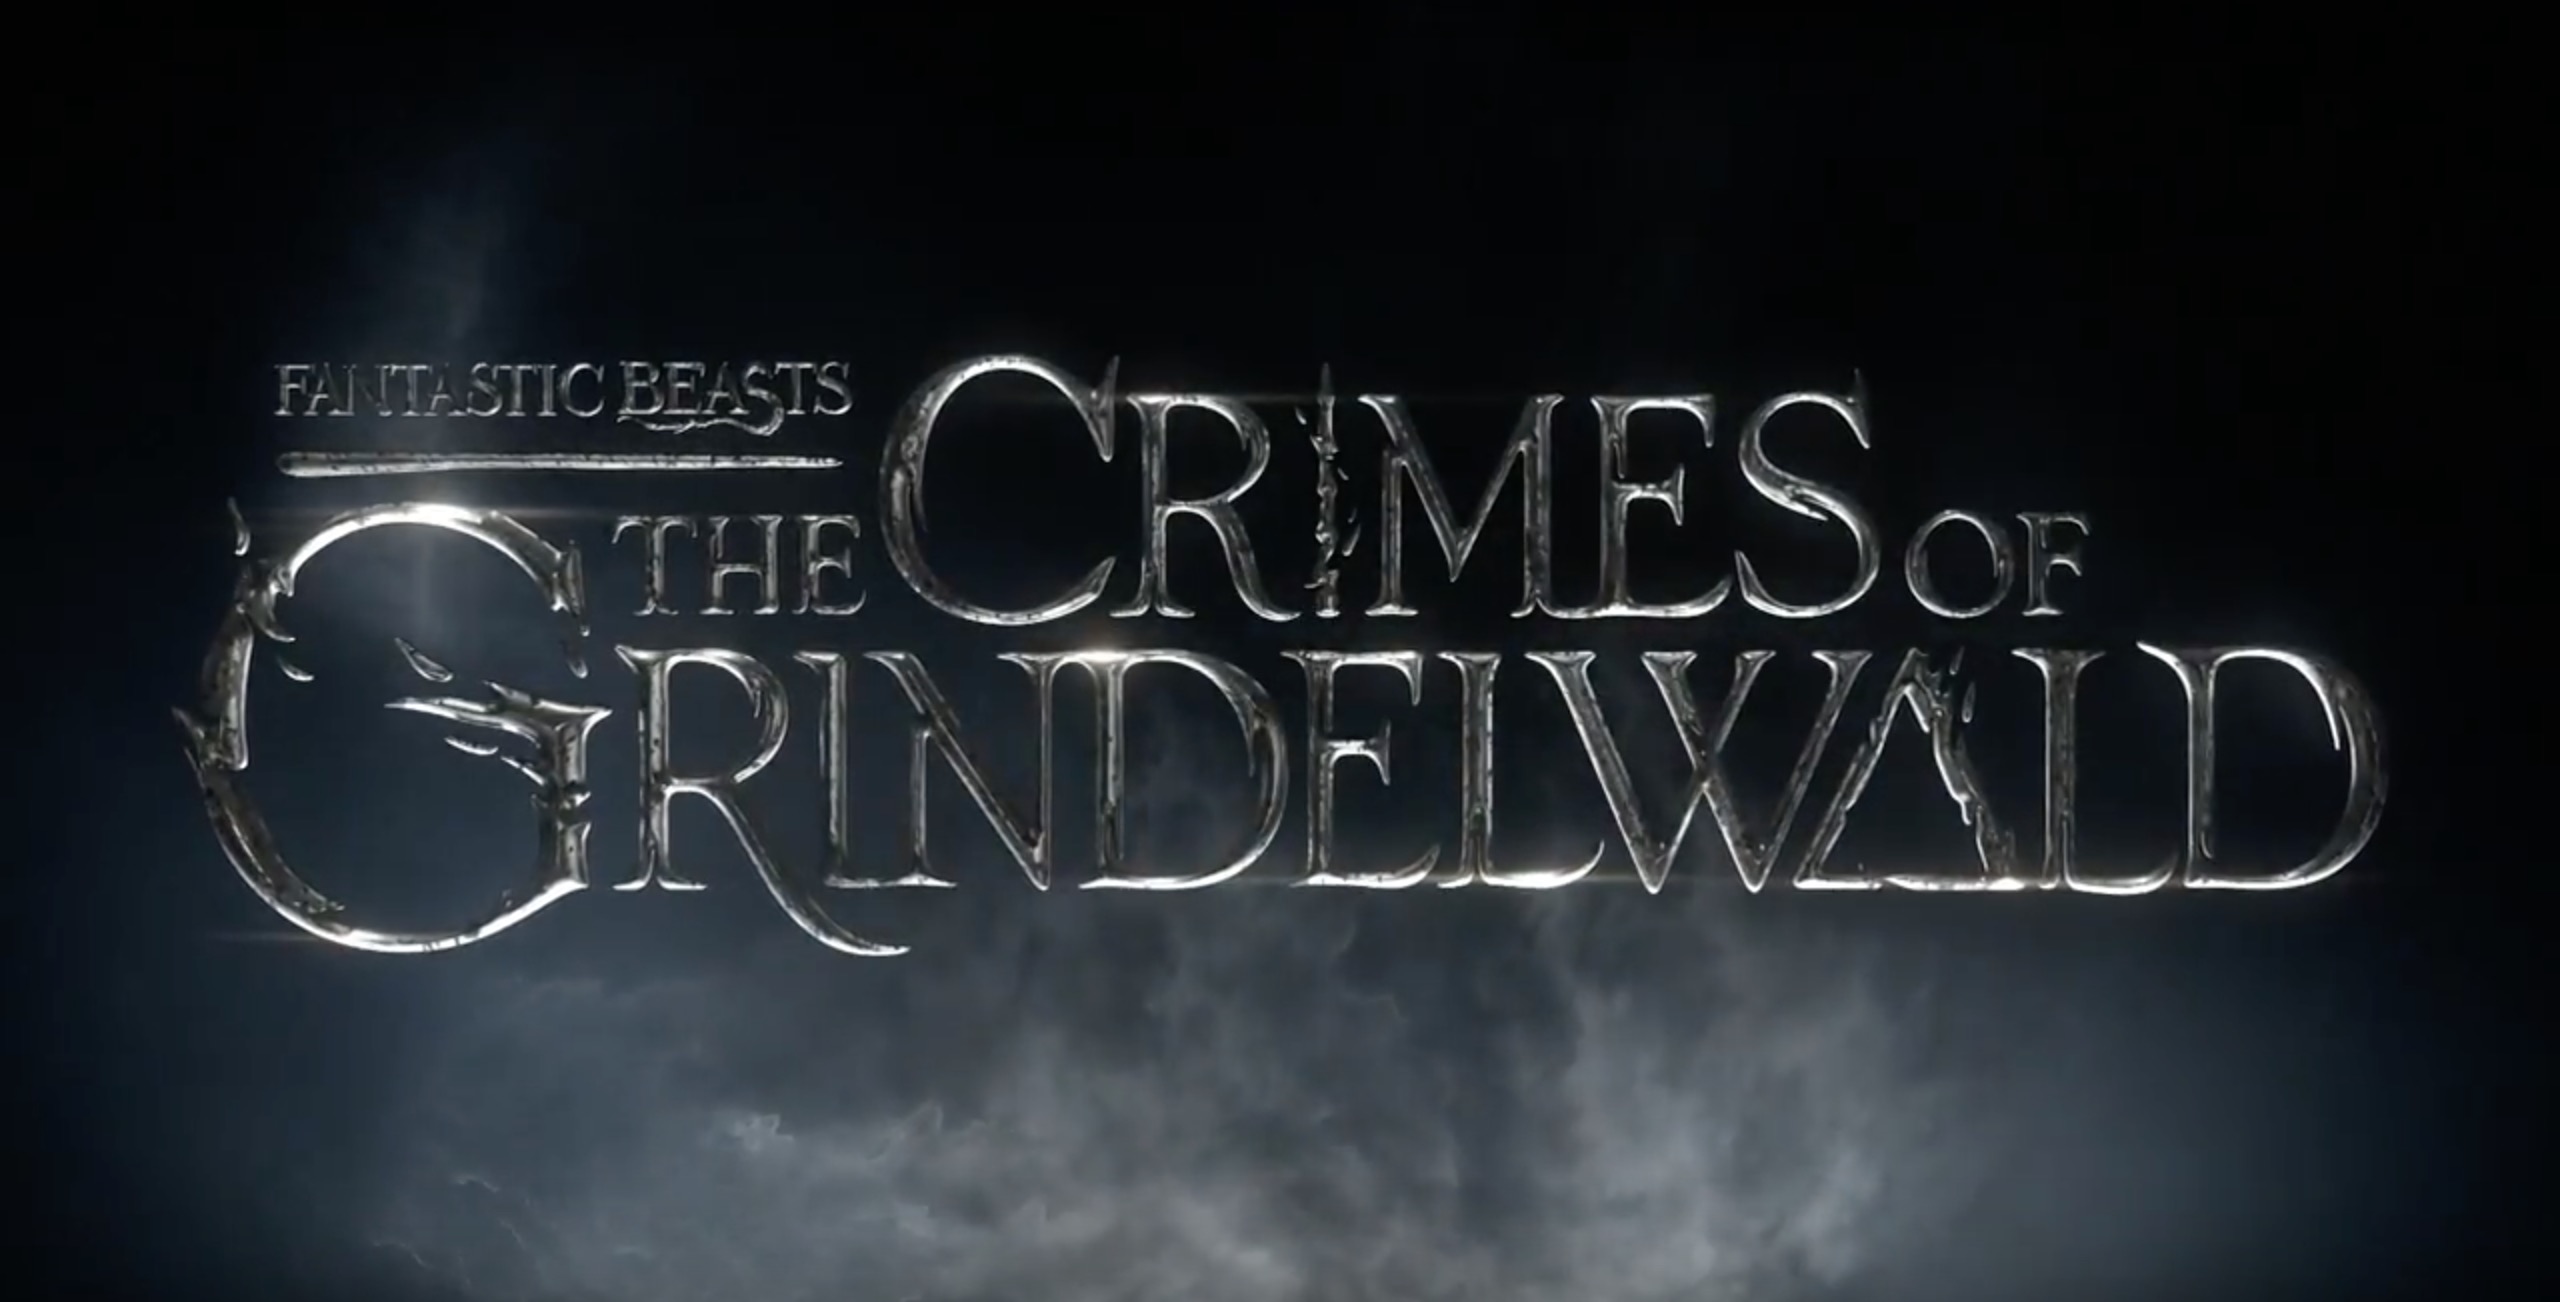
Even the title credits - look how the only three letters to be "breaking apart" are the A in Grindlewald (the triangle), the I in Crimes (the wand) and the G in Grindlewald (the circle)


However,  I then realised its not just in Crimes of Grindlewald, but in Fantastic Beasts and Where to Find Them.


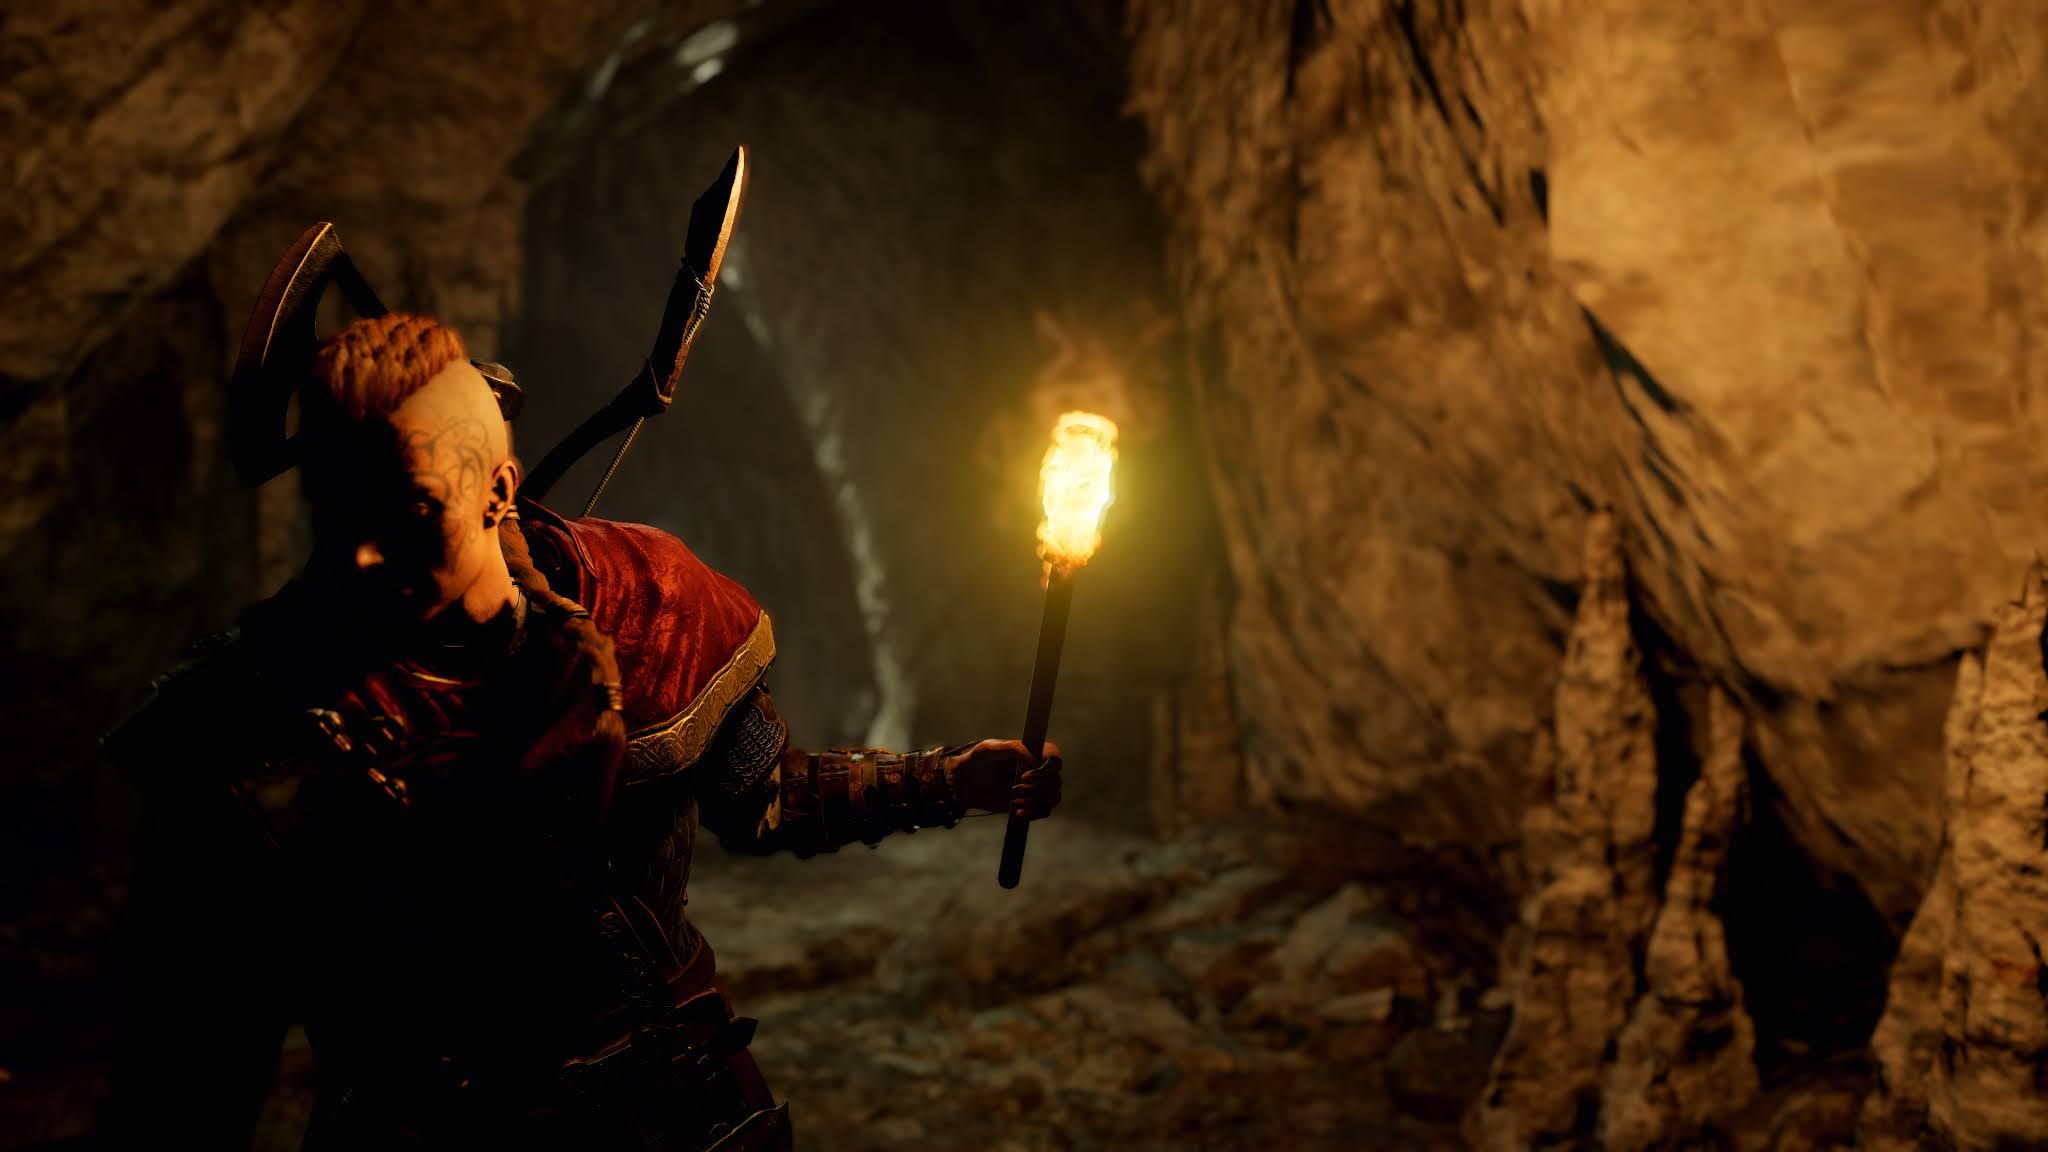
This is the promo character shot for Fantastic Beasts - note the Deathly Hallows symbol pendant handing from the ruins


This is the soundtrack and Bluray cover. Note the right edge of Newts coat forms the side of the triangle, with the wand flair from this wand forming the otherside. He stands in the centre forming the wand, and the curve of the S forms one edge of the circle. Very subtle.


This is the Fantastic Beasts movie poster - note Newt stands on the circle, the stairs form the triangle, and he forms the wand.


This is a "first look" image, released before Fantastic Beasts came out - note how Newts legs, and the light from above form the triangle, the light shaft straight down forms the wand, and he is standing on an arch shape (forming the circle)


They have weaved it into almost promo shot. In Harry Potter and the Deathly Hallows we learn it is known to some as Grindlewalds symbol, although it is not referenced as that in the films, and in Crimes Of, Grindlewald has the Elder Wand (part of the Deathly Hallows), but we have not yet seen the Invisibility Cloak - owned by Harry Potters father (and borrowed by Dumbledore when Harry was a baby).

Highly intriguing...

Tuesday 14 August 2018

Now selling Card Sleeves!

I am now selling Card Sleeves on Ebay (UK only sorry). If you buy more than one I will refund postage :) I use these for all my games, so have many surplus - all brand new and sealed. All proceeds go towards pimping my games and gaming table, and sharing with you the ideas!

These are all genuine premium fantasy flight games sleeves, posted from the UK via Royal Mail. I try to send the same day as you order (unless you order at 9pm..)

Click below to buy

FFG Premium Standard CCG Cards (Grey packet - 50 x clear cards)

These are great for just about any modern CCG / LCG including Magic the Gathering, Arkham LCG, Netrunner (sad face at the cancellation), Lord of the Rings LCG and so so so many more.


FFG Premium Tarot Sized Cards (Orange Packet - 50x Clear Sleeves)

These are ideal for Century Spice Road, Century Golem, War of the Ring, and others that use large cards


FFG Standard American Premium Sleeves (Green packet x 50 clear) or FFG Mini Sleeves (Yellow packet 50 x clear)

Examples of games with cards that Green sleeves will fit: Citadels™, Munchkin™, Descent: Journeys in the Dark™, Bohnanza™

Examples of games with cards that yellow sleeves will fit: Arkham Horror and Eldritch Horror (Board games not LCG), Twilight Imperium 4, World of Warcraft: The Board Game™, Red November™, Cave Troll™


Tuesday 31 October 2017

Home Made Gaming Table "Topper" - Part 3

This is part 3 of my "How I went from being a DIY novice to building my own gaming table" thread - Part 1 is here, Part 2 is here

Lights, Camera, Action

The final part of the trilogy..

So, I wanted lights. All the best tables have lights. Lights are cool. 
No idea how you add them!

After a lot of Googling I found things called LED Strip Lights. They are EXTREMELY expensive.
In Currys and B&Q.

But EXTREMELY cheap everywhere else.

So, Amazon sell them for between £7 and £50, but I found a set with 150 4&5 star reviews, for only £14.99, so I went with them (full disclaimer, I actually went with another brand first, but it didn't work AT ALL so I had to order a second set from a different maker).

This is what I bought...


You get two reels of 5 meter light strip, a power box, remote control and splitter. You can change the colour, dim them, make them flash (God no!) and they attach via a double sided sticky back.

Perfect.

First I had to flip the table top. You can see underneath here more detail of how it sits on the table too (if you are interested, and if you're reading update 3 then I guess you must be).


I had to unwind the lights to test them and set the size. With these you can cut them to size with a pair of scissors. Genius!


It came with a splitter (below) so I could put one set on one side, and one on the other side, then hopefully work out how to connect them when I set it up each time.


The problem I encountered was that my table top was nice and flush when you put in place. So much so that there was no room for the cable to come up.

Now, my electrician skills are as good as my woodwork skills - i.e. non-existent! So, I decided to drill away a small section in the middle, so when it closed there was a small gap just big enough for the wires to poke through.


That was a pain in the backside, as it was under the rim on the side, and not easy to get to. But I managed to get a decent gap in the end, and then set about removing the tape backing and sticking it in place (remembering to wipe down the dust first!)

Below you can see the first one stuck on, with them going through the gap.


Here is a shot of them stuck around the underside edge. When its flipped they will be at the top of the rim, hidden by the edging (which is why I made it a bit wider earlier in Part 2)


I stuck down the second side


Then attached the Remote box, connected the wires (so I could work out how much give I had) and then attached the box to the side of the table with 2 small pins.


Below you can see the small hole I made for the wires to come out. I always sit at the same spot in the room, so I had the wires come out here, so no one else would have to see them!


I then tested them. 

LIGHT!!!


Ok, time to flip the table, and set it up, and test it properly. 

Below you can see how the wires looked when it was all ready to go.


And here it is!! My finished Gaming Table Topper complete with Lights!


My camera struggled a bit with the LED's, but hopefully you can see well enough to get a feel for it.


The best bit (for me) is that due to the way this is made I can quickly change the table cloth colour, and with the LED colour change remote I can then change the lights to match. Wonderful!!

I hope you like it, and if you want to make you're own and need some advice just drop me a note. And please do let me see any you make that were inspired by this!

Good luck!

----------------------------------------------------------------------------------------------------------------

Tech bits in case you are building one - the felt was from Dunelm (UK), where they cut to your size for around £5 a meter. The wood was from B&Q - between £2 and £5 per section depending on the piece. The rubber underlay was around £3 a meter from Dunelm (cut to size). In total I spent about £65, and it took me around 8-9 hours to complete from start to finish (not all in one day!).